A Beginner's Tale of Tackling DIY Home Security Camera Installation
So, you’re thinking about installing a security camera system in your home all by yourself, huh? Let me tell you, venturing into DIY home security installation can feel a bit like deciding to cut your own hair: it seems straightforward until you're tangled in wires and user manuals. But worry not! I’ve walk-walk-walked this path (with minimal casualties) and I'm here to guide you through setting up your home security without needing to call in a professional—or at the very least, to keep the swearing to a gentle murmur.
Here’s my personal walk-through, sprinkled with those 'I wish someone had told me that' insights, to help you set up your system with both confidence and minimal wall drilling errors.
What You’ll Need: The Shopping List
Before we dive into the nuts and bolts (sometimes literally), let’s start with what you’ll need:
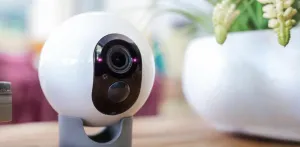
- Security cameras: Whether it's wired or wireless depends on how much mobility you want your cameras to have and how much house renovation challenge you can handle. (taskrabbit.com)
- A drill: If you’re going wired, you’ll need this to make some room for those wires.
- Screws and mounting hardware: Usually comes with the cameras, but it’s good to have extras just in case.
- Monitor or recording device: Unless you plan on streaming directly to your mobile or computer.
- Network components: Like modems or routers, if you're going wireless, and cabling if you are not.
Not too bad, right? Just your standard techie shopping spree. Plus, imagine all the cool points you’ll score with the family when you're up on a ladder, drill in hand—just don’t fall off in all your glory.
Step 1: Planning Your Camera Locations
This step is crucial and best approached with a blend of tactical strategy and a hint of creativity. You need to think like both a homeowner and a bit of a sneaky villain. Where are the most vulnerable points around your home? Generally, you’ll want to cover:
- Main entrances: Front door, back door, garage door.
- Windows accessible from the ground.
- Common areas: Living room, kitchen, hallway.
Take a slow walk around your property and try to identify potential weak spots. And remember, cameras aren’t just for catching bad guys; they’re also great for seeing when the teenagers actually get home or when the delivery guy drops off your package wrong. Need inspiration for camera positioning? Check out optimal placement tips. (security.org)
Step 2: Installing the Cameras
Alright, this is where the rubber meets the road. Or in our case, where the drill meets the wall. Here's a tip: start by mounting one camera at a time. Trust me, the satisfaction of seeing even one camera up and running will significantly boost your morale.
For wired systems, you’ll need to be prepared to drill holes not just for the screws, but also to run the wires. It’s not as scary as it sounds—just make sure you measure twice and drill once. Depending on your setup, you may need to drill through walls or ceilings, so have patience and maybe a helper to hand you tools or moral support. For guidance, follow this step-by-step wired installation guide.
For wireless systems, it’s a bit less invasive. You’ll mostly focus on securing the camera in place. Here, placement flexibility can be both a blessing and a curse. Try a few different spots before finalizing their homes. (homedepot.com)
Quick Tale: When I attempted my first installation, I realized halfway through that the front door camera was angled more towards showing off my lovely shrubs than providing a clear view of visitors’ faces. A quick adjustment was needed—along with some shrub-trimming.
Step 3: Connecting Everything Together
Now that the physical part is somewhat behind us, here comes the tech fun. Setting up the connection — whether via wires or through the magic of Wi-Fi. If you're using a wired system, follow the manufacturer’s guide to connect the cameras to your DVR or recording device. This usually involves plugging the video cable into the correct ports and ensuring all connections are secure.
For wireless cameras, it should be easier. Ensure your home Wi-Fi is strong enough to handle the extra load. You’ll connect each camera through the brand-specific app on your smartphone or tablet. This typically involves scanning a QR code and following on-screen instructions. More details on setup can be found in this guide to connecting wireless security cameras. (security.org)
And remember, if things seem overwhelming, taking a break is perfectly okay. Sometimes stepping back is all it takes to see where that darn last step went wrong.
Final Thoughts and Security Smarts
Installing your own home security cameras can be a rewarding project. It's not just about the peace of mind that comes with added security, but there's a certain satisfaction in doing it yourself. Be patient, follow the steps, and don't be too hard on yourself if it doesn't go perfectly smooth on your first try. Every hole drilled too deep or wire mistakenly crossed is just part of the learning curve!
And my final, most heartfelt piece of advice: Enjoy observing your handiwork! Whether it's catching those mysterious midnight critters in your garden or just watching over your home, it’s incredibly fulfilling to know you’ve set this up all by yourself. As they say—your home, your fortress.
Now go ahead, give yourself a pat on the back, brew a good cup of coffee, and start monitoring. You’ve earned it!