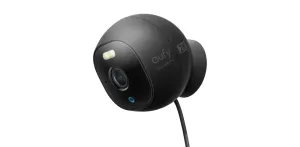
The Quest for Power: A Journey into Wiring Home Security Cameras
Once upon a time, I thought setting up a home security system would be a simple plug-and-play affair. How wrong was I! The quest to ensure our homes are secure and our family safe can often feel like wiring a spaceship for launch. Especially when dealing with wired security cameras, powering them effectively isn't always straightforward. Let me take you through what I've learned, with hopes it'll give you a smoother ride.
Understanding Your Power Needs
The first step on our journey is to understand the basics of what powers your camera system. Trust me, knowing this is half the battle won. Wired security cameras typically need a reliable power source to function effectively, as they don't use batteries like their wireless counterparts. Here’s the rundown on what you need to know:
- AC versus DC: Most home security cameras operate on either 12V DC or 24V AC. The type of power depends on the camera’s design and the complexity of the system. It's like choosing between a diesel or a petrol car – both will get you places, but they work differently under the hood. (cctvcamerapros.com)
- Power Adapters: These transform the type of power from your home (AC) into what your camera can use (DC). It’s akin to converting your Euros to Dollars when you travel to the States.
- Power over Ethernet (PoE): Some cameras use an Ethernet cable for power and data. Imagine it as a multitasking wizard, carrying electricity and data all at once over a single cable.
Knowing which setup your home security system uses is crucial for understanding the type of equipment you’ll need. If you're like me, not knowing your DC from your AC could lead to unexpected shopping trips or, worse, a non-functioning camera just when you need it most.
The Right Tools for the Job
With the basics down, let's scout some essential tools and accessories needed for a smooth installation. Here's my go-to list, learned from a few mishaps and some triumphs:
- Voltage Tester: Before diving into any wiring, a voltage tester can save you from a shocking experience—literally. It helps verify that the power is off before you start working.
- Drill and Bits: For a sturdy installation, you'll likely need to mount the camera. Having a good drill and various bits ensure you're prepared for different materials—be it wood, drywall, or masonry.
- Wire Strippers: If your installation includes splicing or adapting wires, these are indispensable. They’re like the Swiss Army knife for any DIY electrician.
- Cable Ties and Clips: After painstakingly setting up the cameras, the last thing you want is for cables to dangle or get snagged. Cable ties and clips keep things neat and tidy.
Each tool serves a specific purpose, much like how each spice in your rack adds a different flavor to a meal. Getting your hands on these tools beforehand means you can focus more on the installation and less on multiple trips to the hardware store. (security.org)
Step-by-Step: Wiring Your Cameras
Talking about wiring might seem as dry as a nutrition label, but bear with me—it’s less complicated than it sounds. Here’s a straightforward guide to get those cameras up and running:
- Plan Your Camera Positions: Map out where cameras should go. Ideal spots usually include main entrances, driveways, and windows that aren’t easily visible from the street. Think of it-—like placing your figurines in a game of chess. Strategic positioning is key.
- Install Mounting Brackets: Use your drill to mount the camera brackets. This step requires precision, as a loose camera won't do you any good if it’s constantly sagging or shifting.
- Run the Cables: Whether you’re using PoE or traditional power options, the cable running part can be a workout. It’s best to route cables along eaves, through attics, or walls for security and aesthetics. It's like routing plumbing in a new bathroom—neatness counts!
- Make Power Connections: Depending on your camera setup, connect your camera to the power supply using the instructions provided. This step is critical; it’s the lifeblood for your cameras.
- Test the System: Before finalizing everything, perform a system check. Ensure that every camera powers up and the feeds are going smoothly to your monitor or recording equipment.
If anything goes wrong here, it's usually a simple fix of rechecking connections. It reminds me of when I first built a computer—plugging in everything only to find the power supply switch was off!
Non-negotiables for Effective Power Management
To wrap up your installation with confidence, here are a few tested truths:
- Always double-check compatibility: Ensure all components match up in terms of voltage and power requirements. It’s like making sure all parts of a toy kit are from the same set.
- Maintain your equipment: Regular checks can prevent many problems. Treat your security system like a car; it needs occasional maintenance to run smoothly.
- Consider professional help if needed: Sometimes, it’s best to call in the pros, especially for complex installations. It's like calling a plumber for that leak you just can't seem to fix.
There you have it—your brief guide to powering home security cameras. Next time you embark on this project, remember it’s not just about securing your home, but doing so effectively and safely. Whether you're a seasoned DIYer or a first-timer, each step you take improves your skill and understanding of home tech.
Lastly, keep in mind that knowledge like this not only makes our homes safer but also turns us into more capable and confident homeowners. So, here's to our next successful project!


